Mastering Techniques: Moncohrome Portrait in Oils Part 1
Introduction
Monochrome portrait studies are a great way to bridge the gap between drawing portraits and tackling full colour portrait paintings. By embracing a limited color palette, artists are challenged to explore the nuances of light, shadow, and texture, ultimately crafting powerful narratives through the interplay of grayscale tones.
In these lessons, we will delve into the techniques that bring paintings to life. From controlling values to the careful rendering of intricate details, we will gradually craft an engaging portrait study.
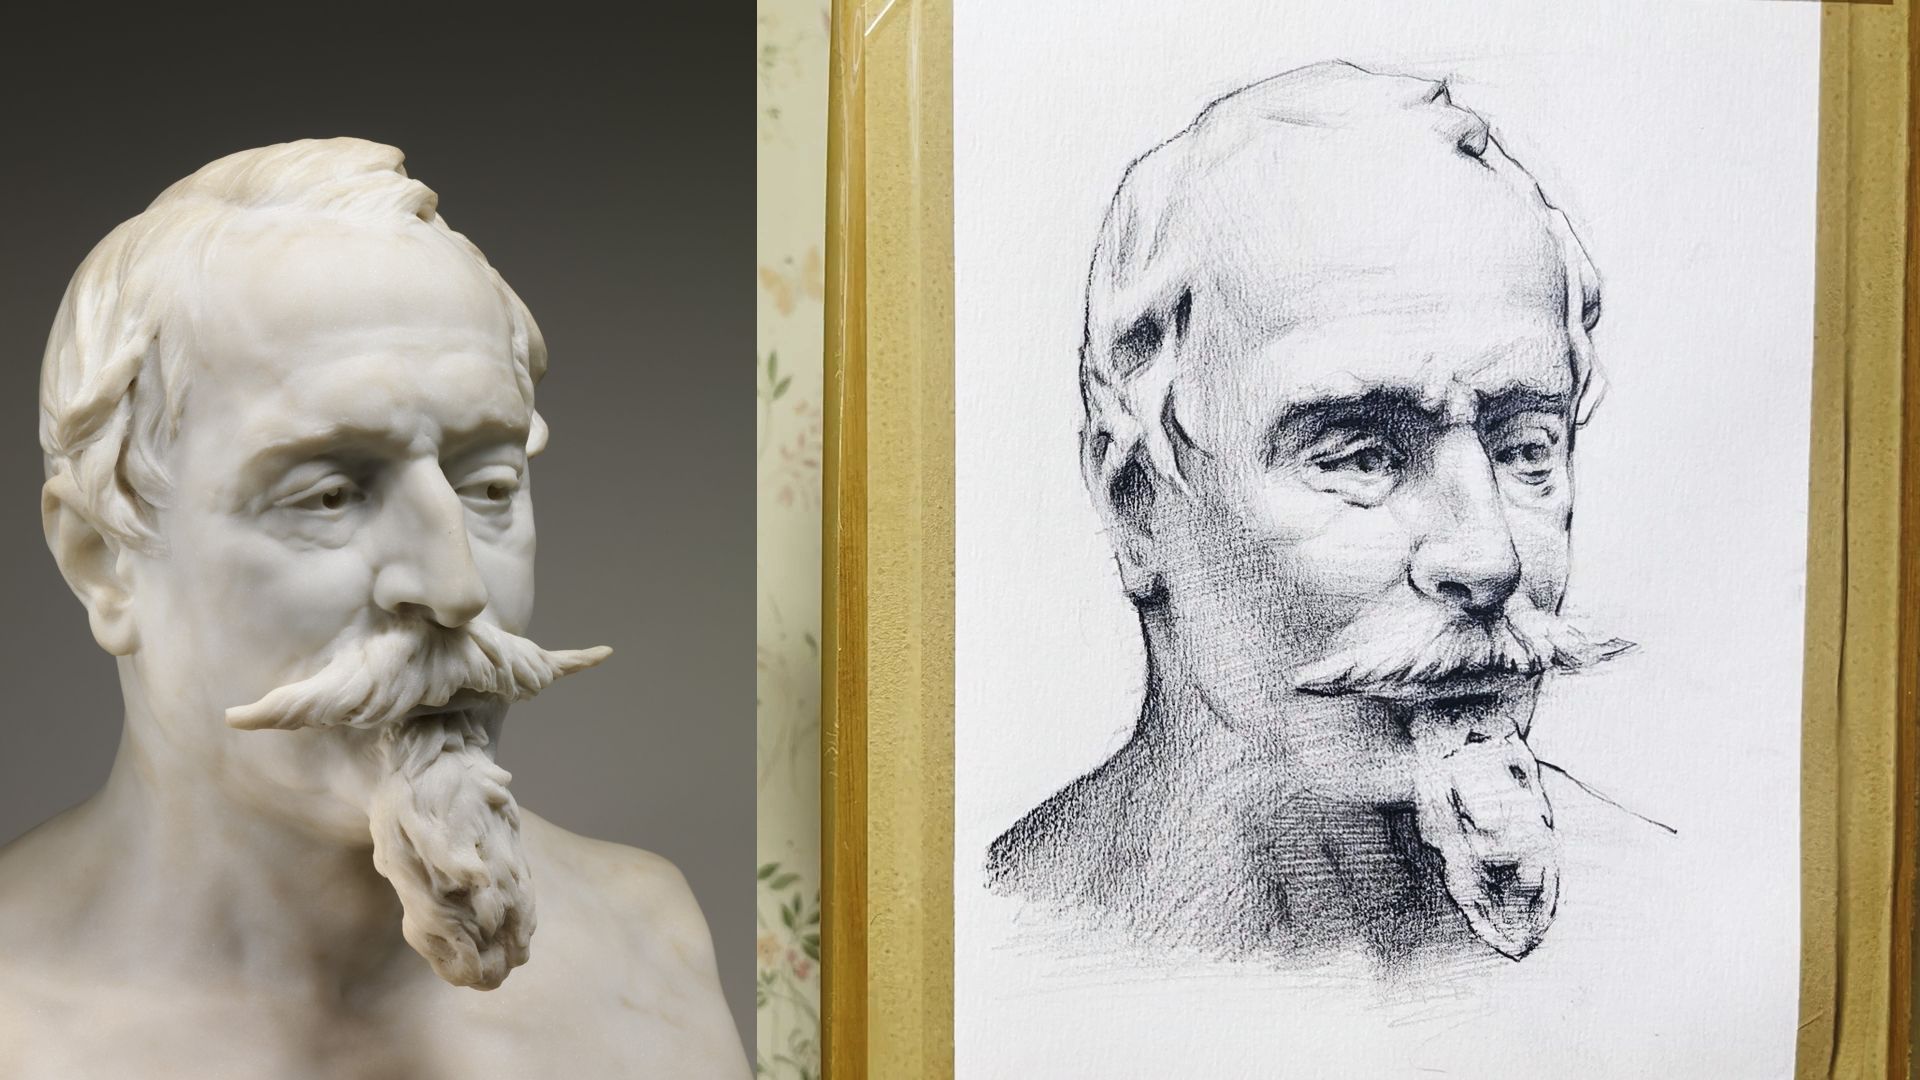
Reference image link (from the Met Museum collection)
Materials
- Canvas, panel or paper for oil painting
- Palette
- Two medium brushes (one stiff, one soft)
- Mineral spirits for diluting
- Burnt Umber, Raw Umber and Ivory Black oil paint
- Paper towel or a rag
Getting Started
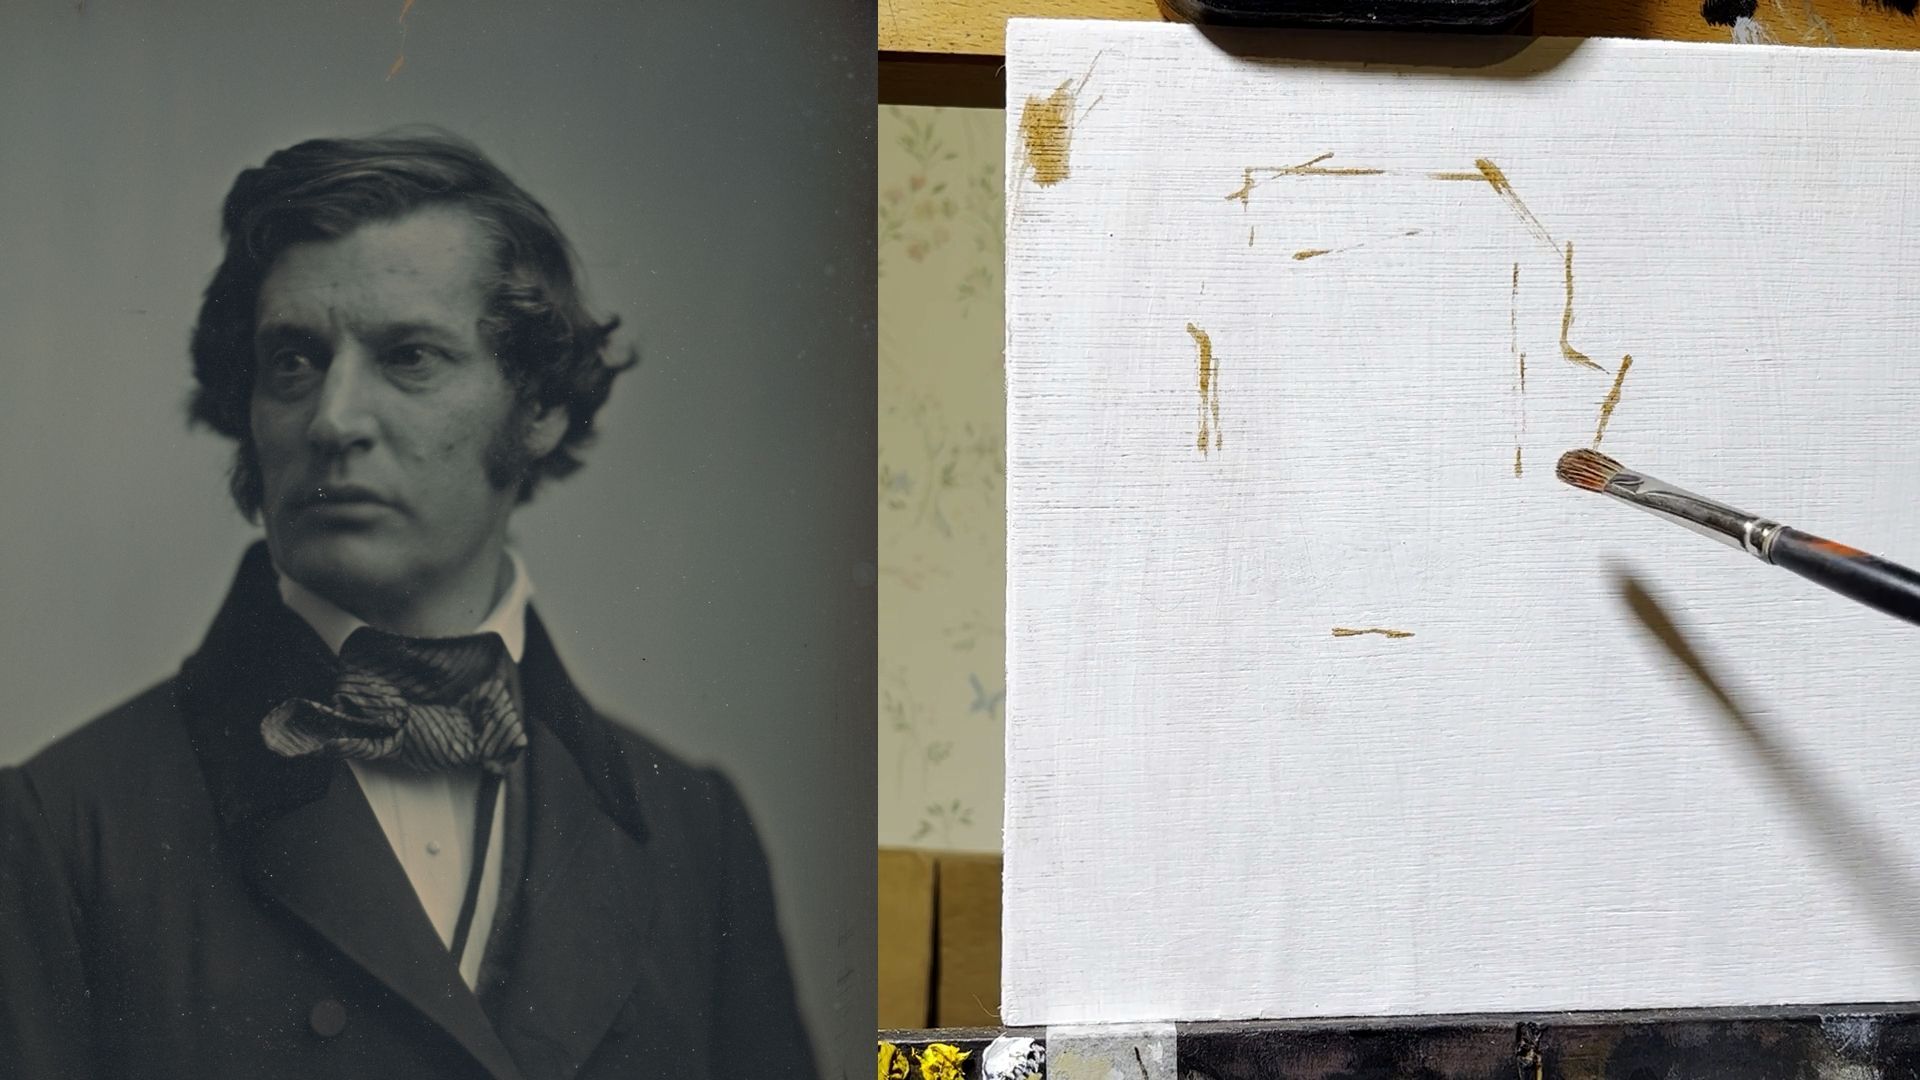
1. Begin by placing the overall height - from the top of the hair to the bottom of the chin; then the width - left hand hair to right hand hair. Try to make sure that the width and height are in proportion as this will make things much easier later on.
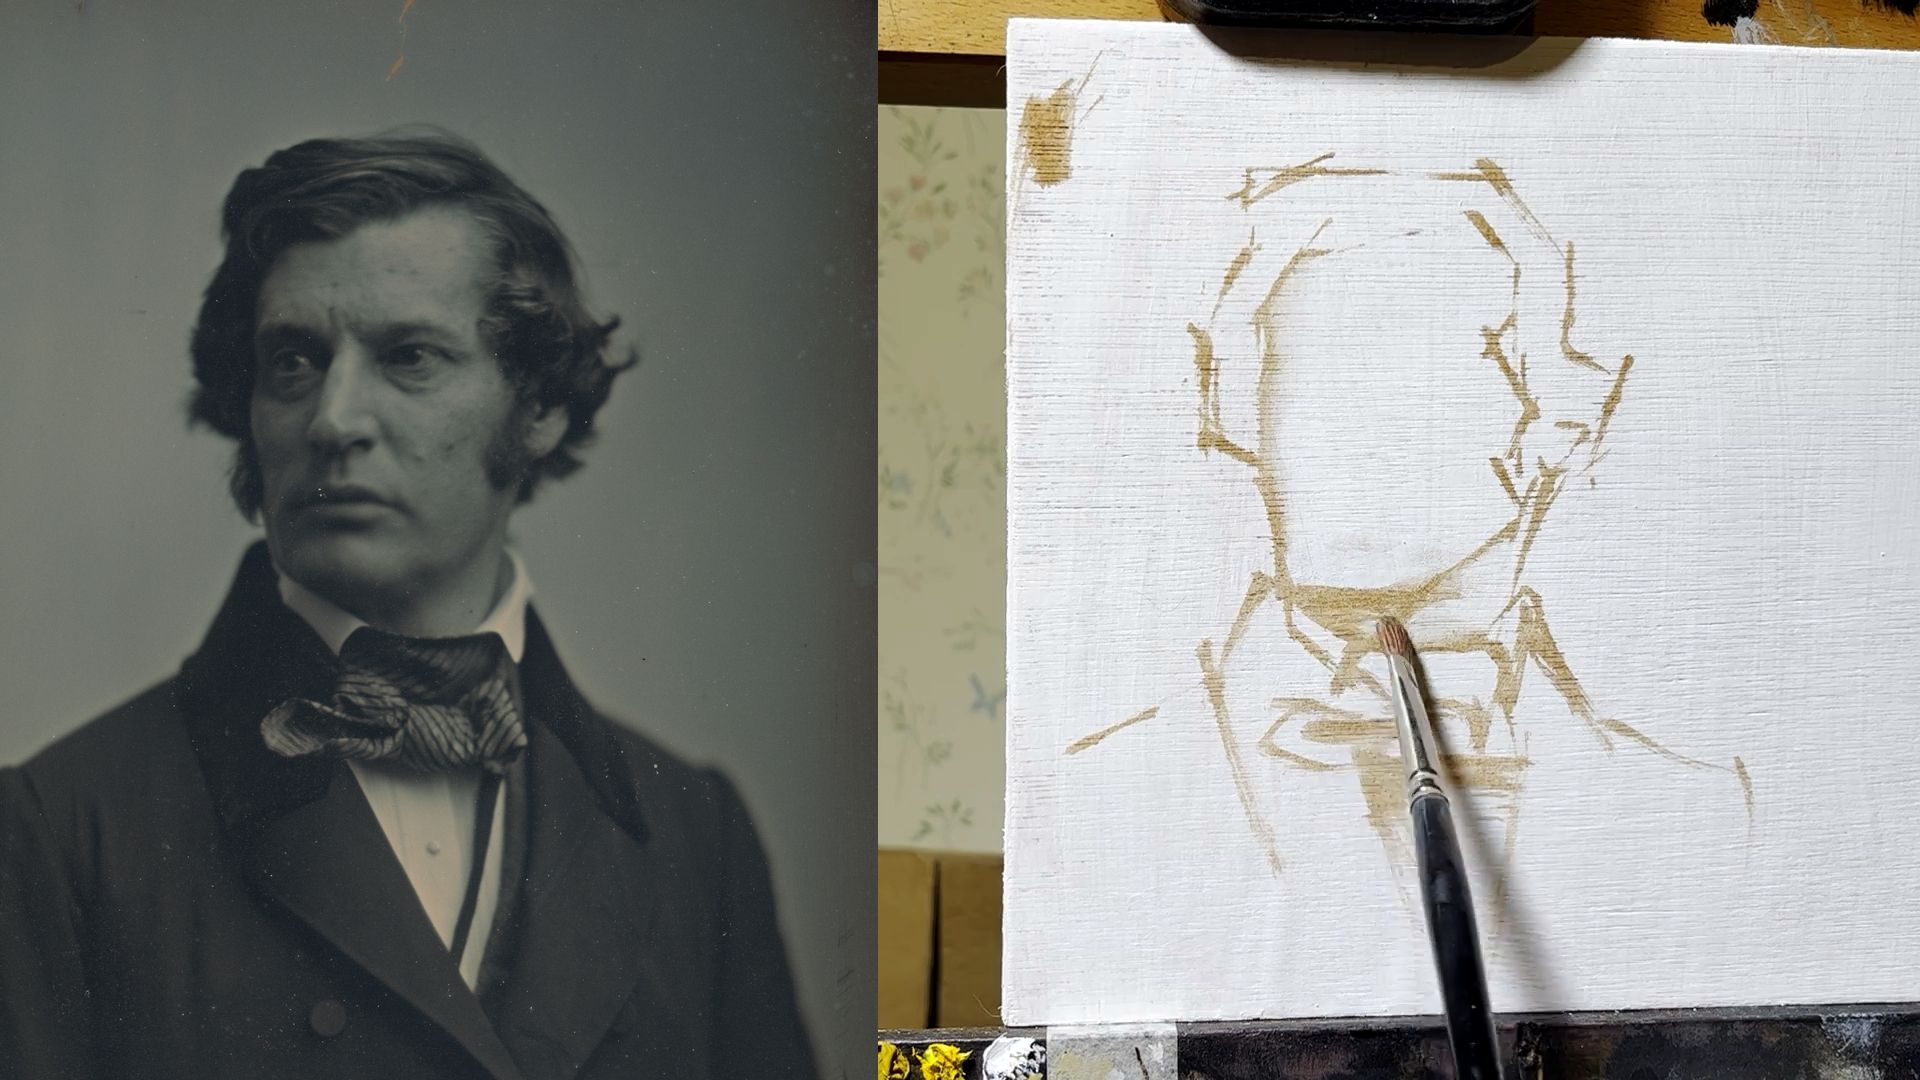
2. You can dilute your paint quite a lot; an almolst watercolourish consistency is ideal at this stage. Continue plotting more lines to define the overall outside of the head and the face within.
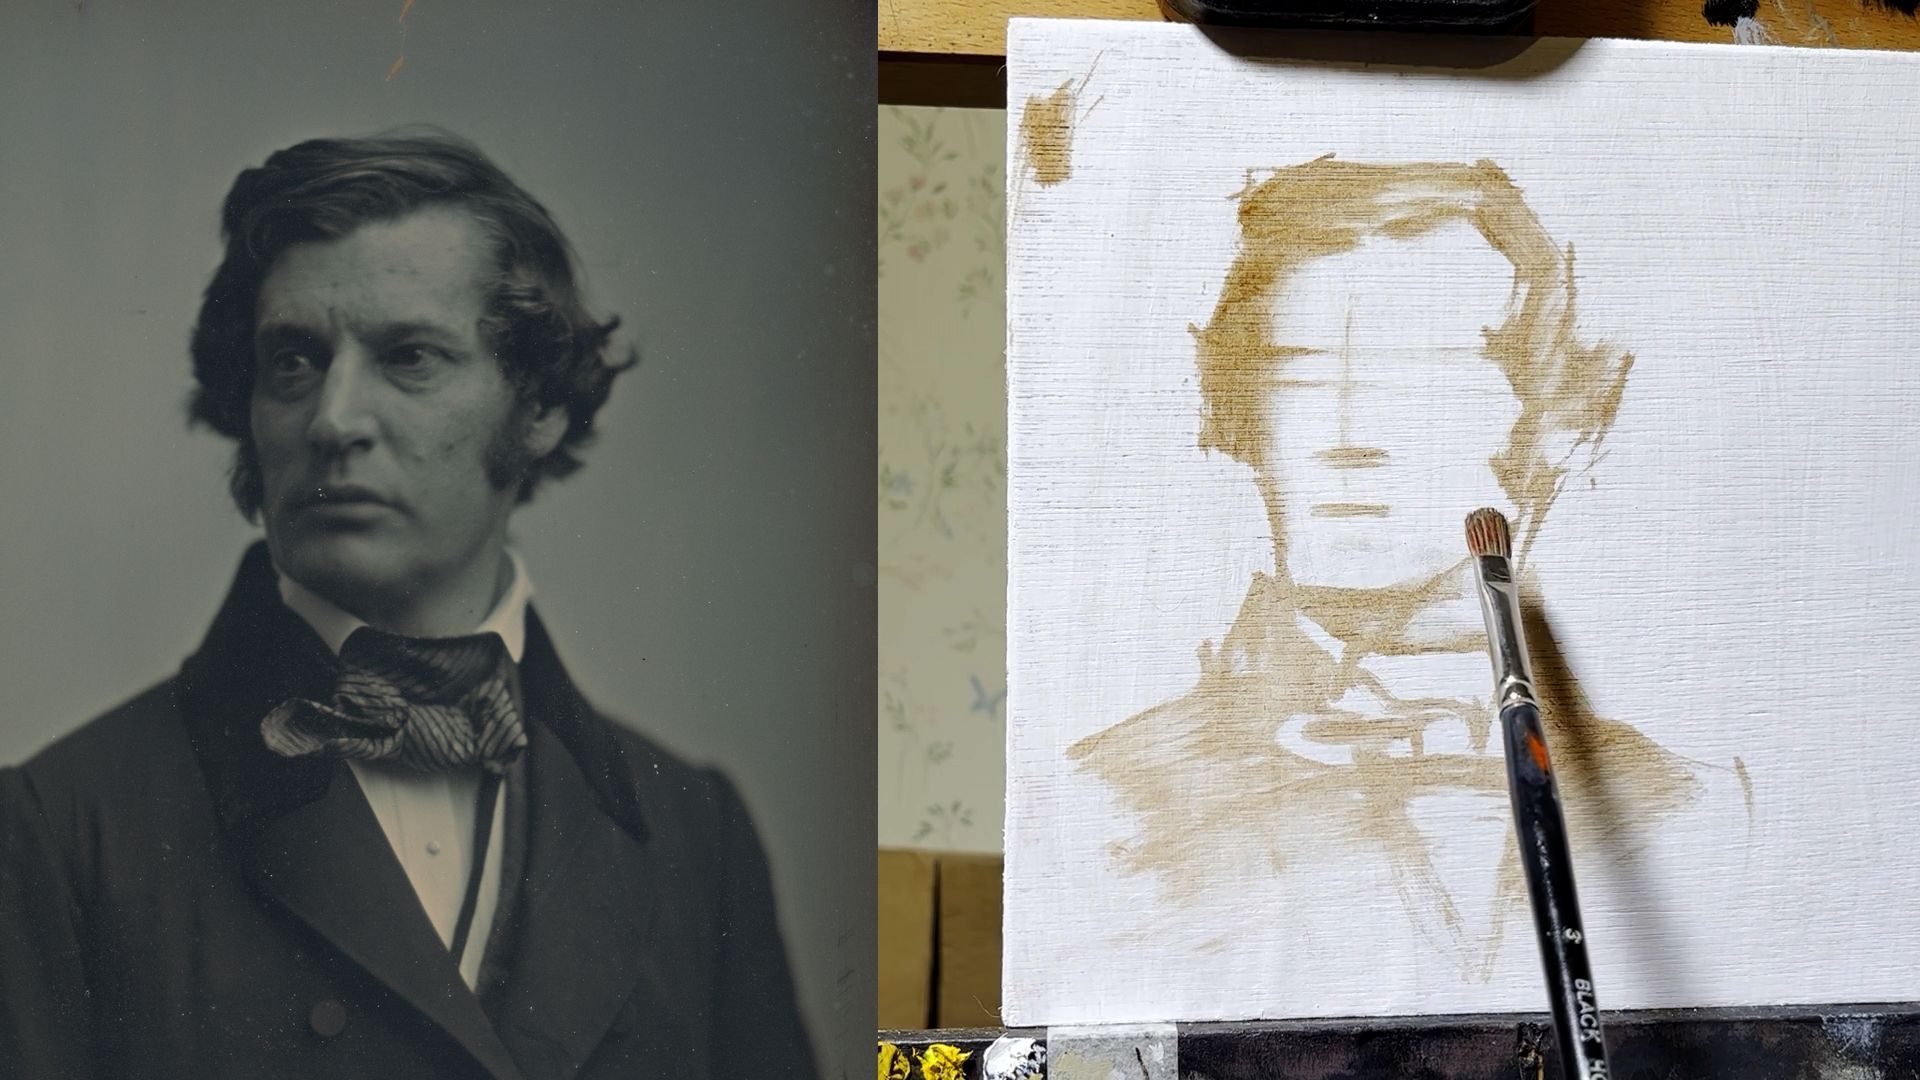
3. Once the overall proportions seem ok, and you’re happy with the placement of the portrait on your surface, you can start finding dark shapes and massing them in as distinct from the light shapes. Make any necessary corrections by wiping back with a brush dipped in your solvent (dilutant).
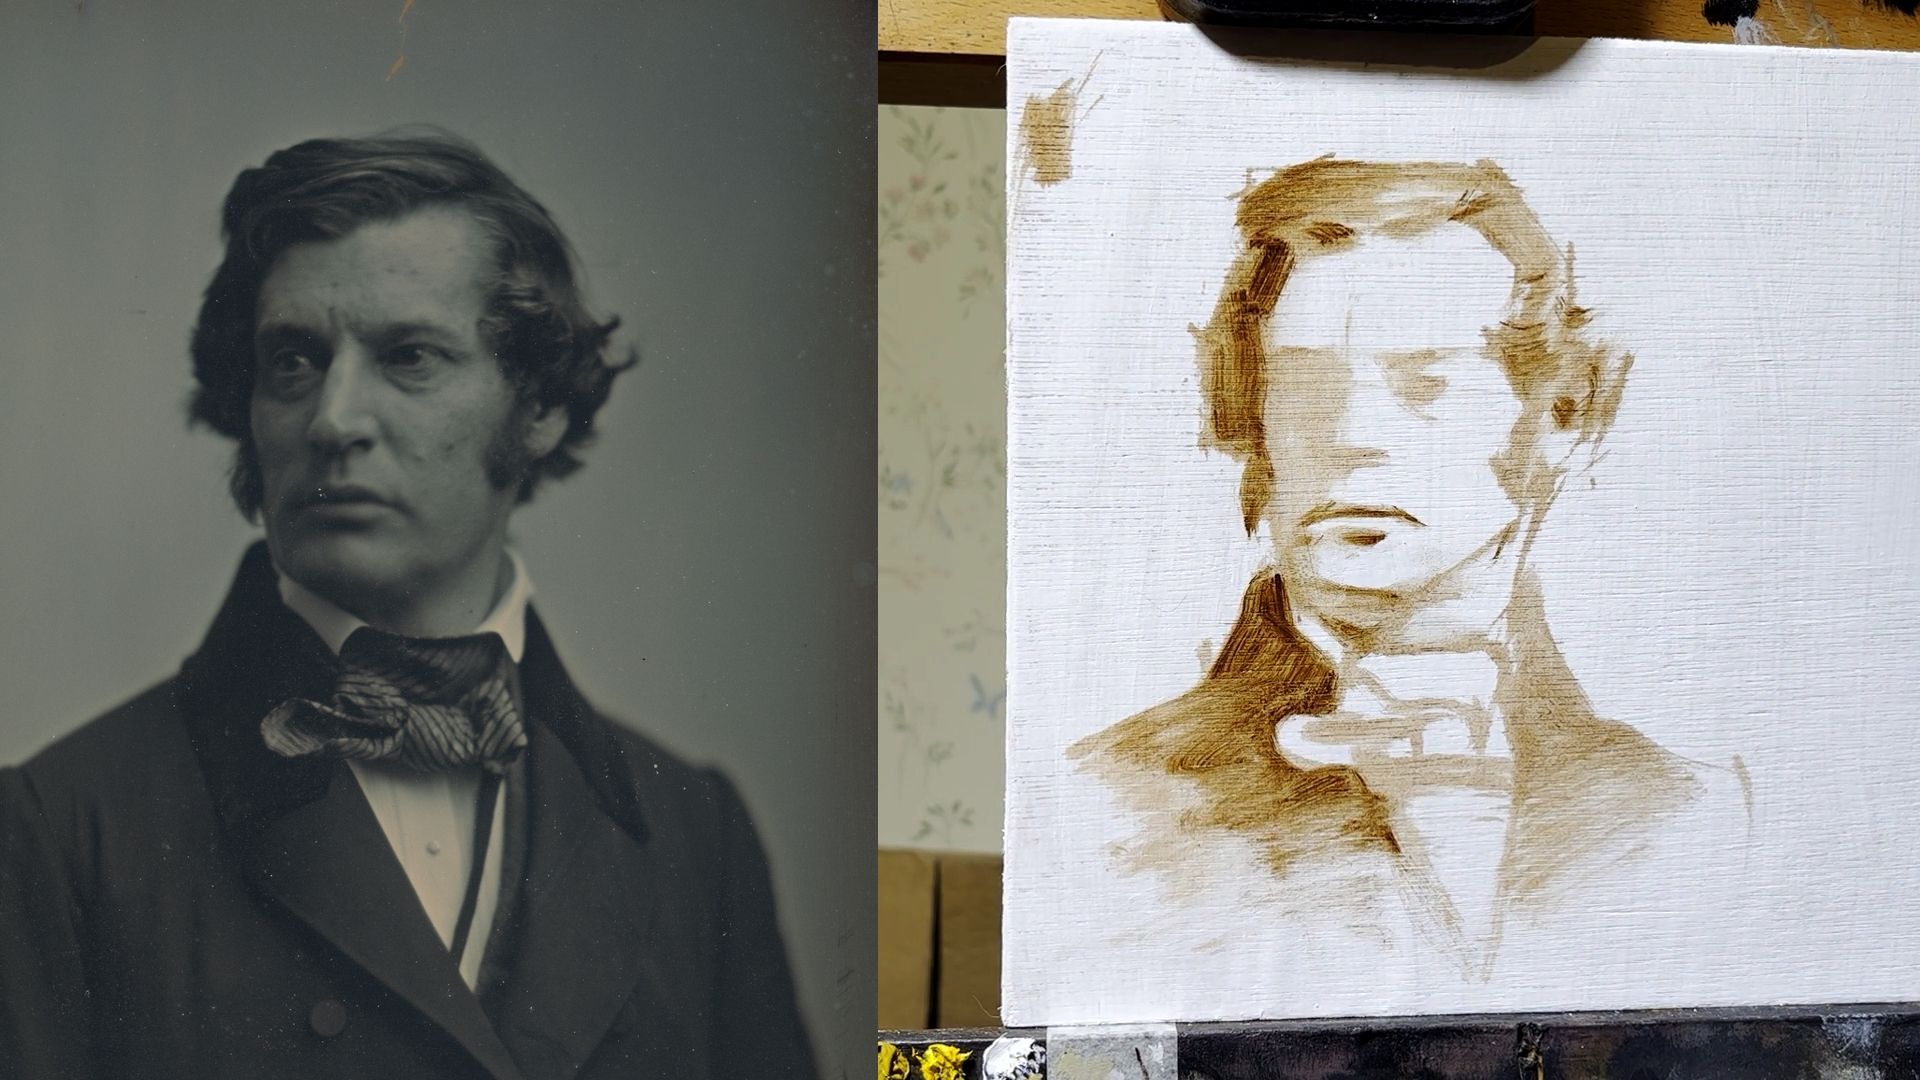
4. When you’re happy with these shadow shapes you can take much thicker paint to lay in darker tones and define the shadow edges more vigorously.
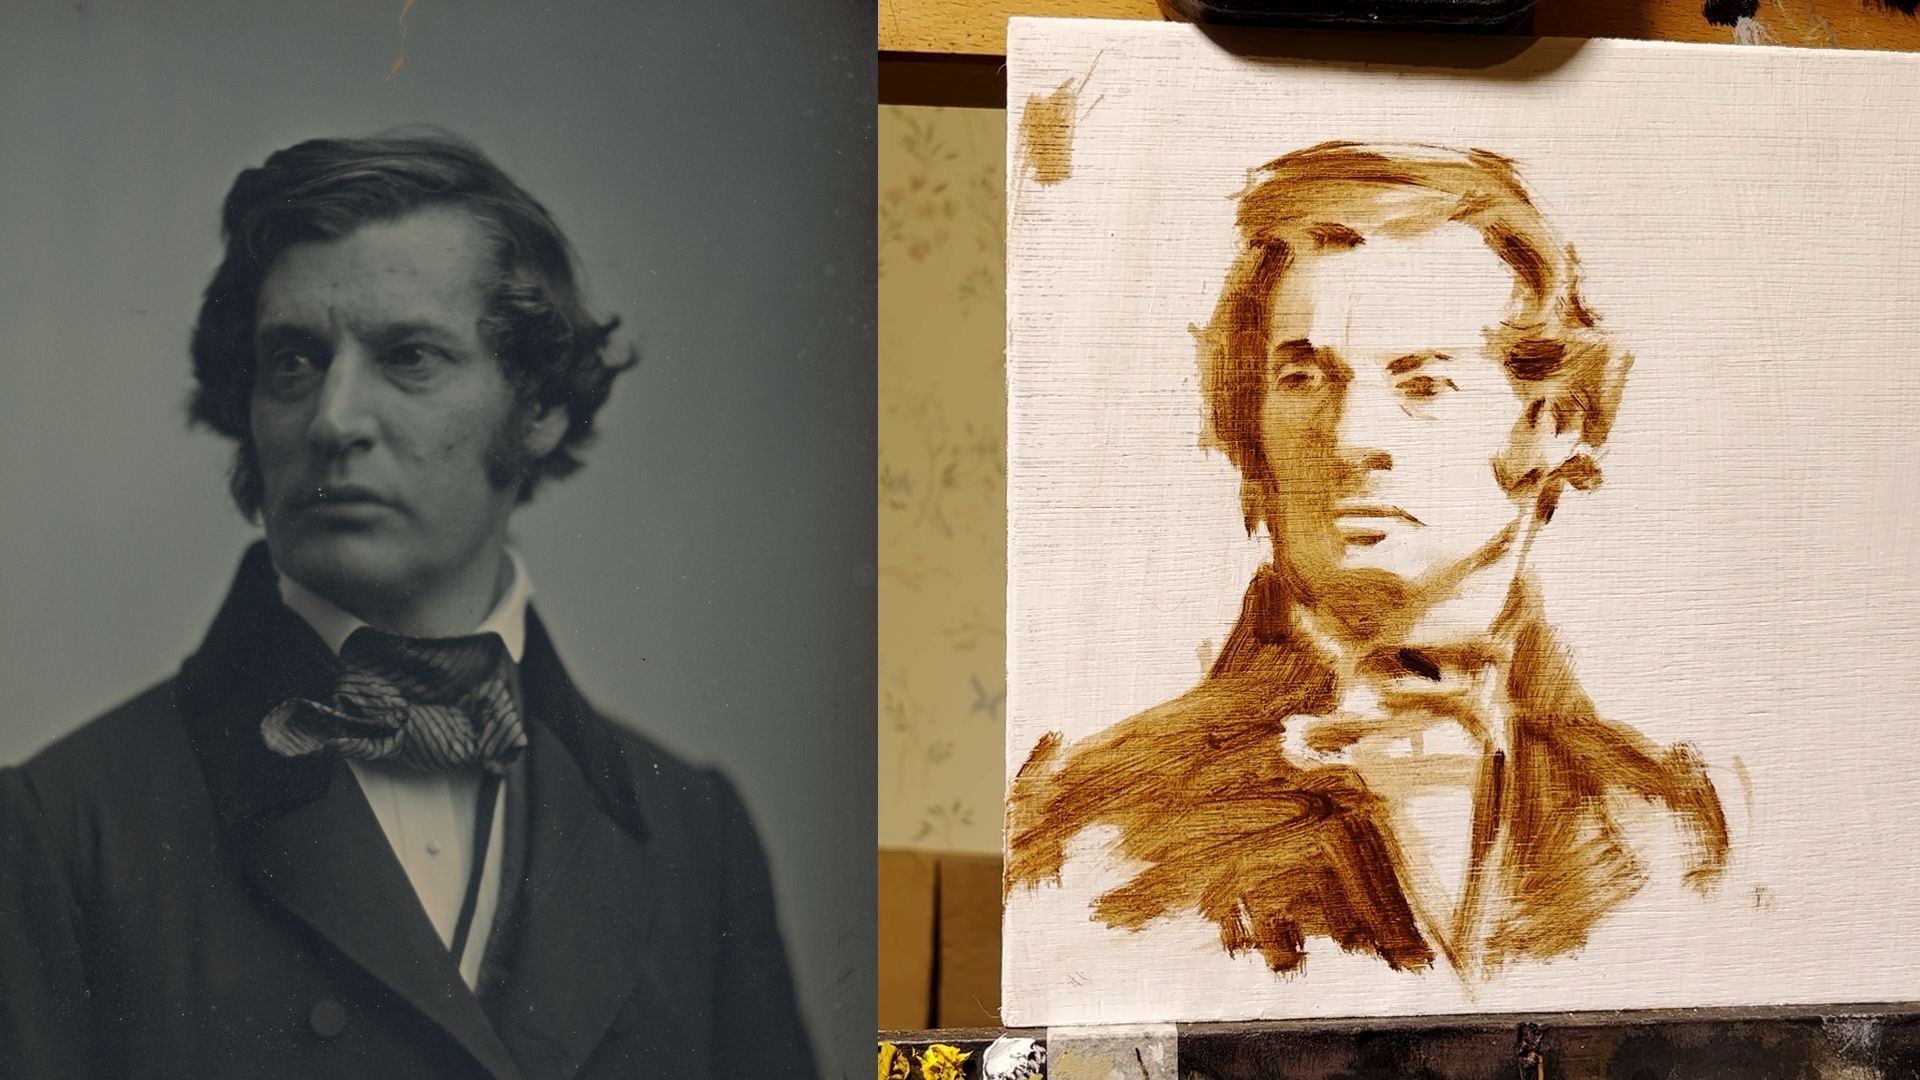
5. Keep modifying things until you get something with about this much detail - a nice loose feel is ideal. Then you can leave it to dry before the next pass.
Let this layer dry before moving on to the next stage!
Developing the Dark Tones

1. Take raw umber and dilute it with odourless mineral spirits. Create a thin, transparent wash by adding enough medium to achieve the desired consistency. The wash should be light enough to allow the under-drawing to show through. This wash acts as a unifying layer and helps establish the overall tonal values of the painting.
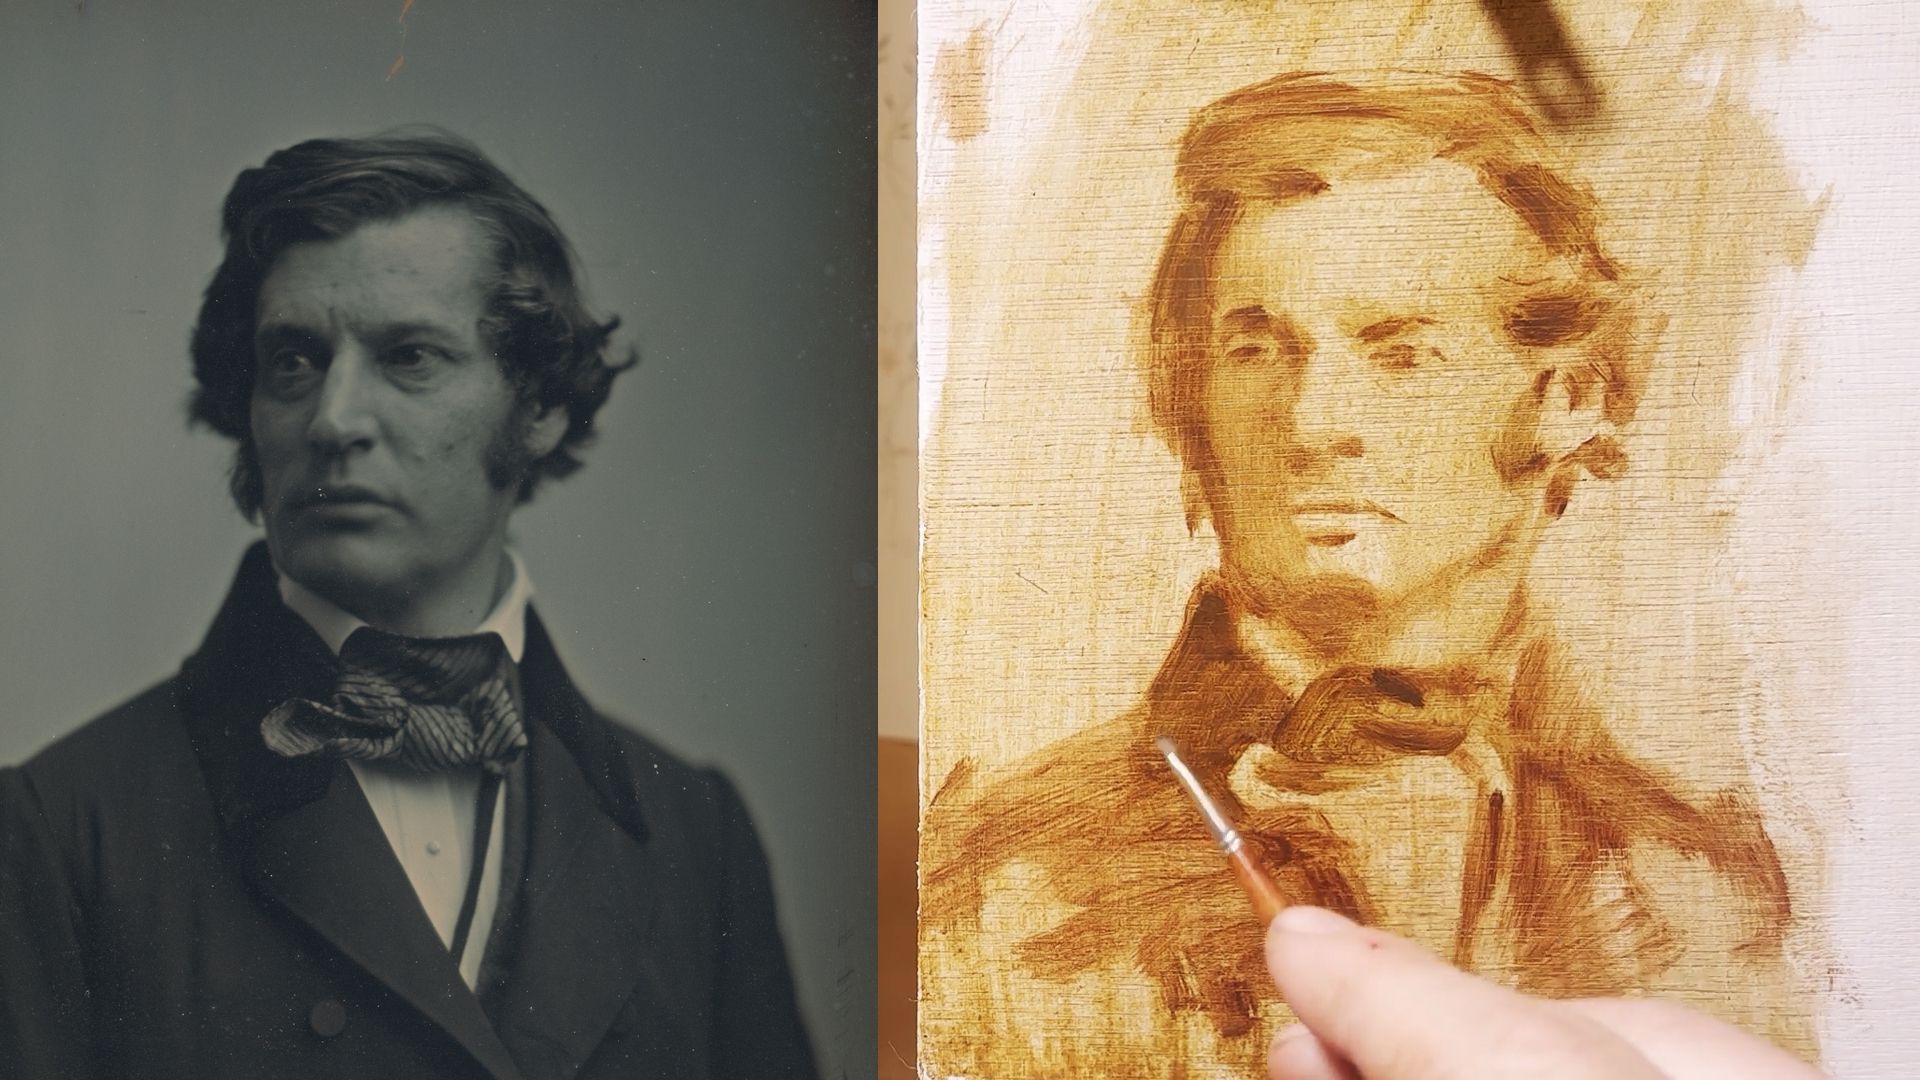
2. Using burnt umber, raw umber, and ivory black, mix various shades of brown and black on your palette. With a medium brush, start adding darker tones to the areas that require shading or corrections.
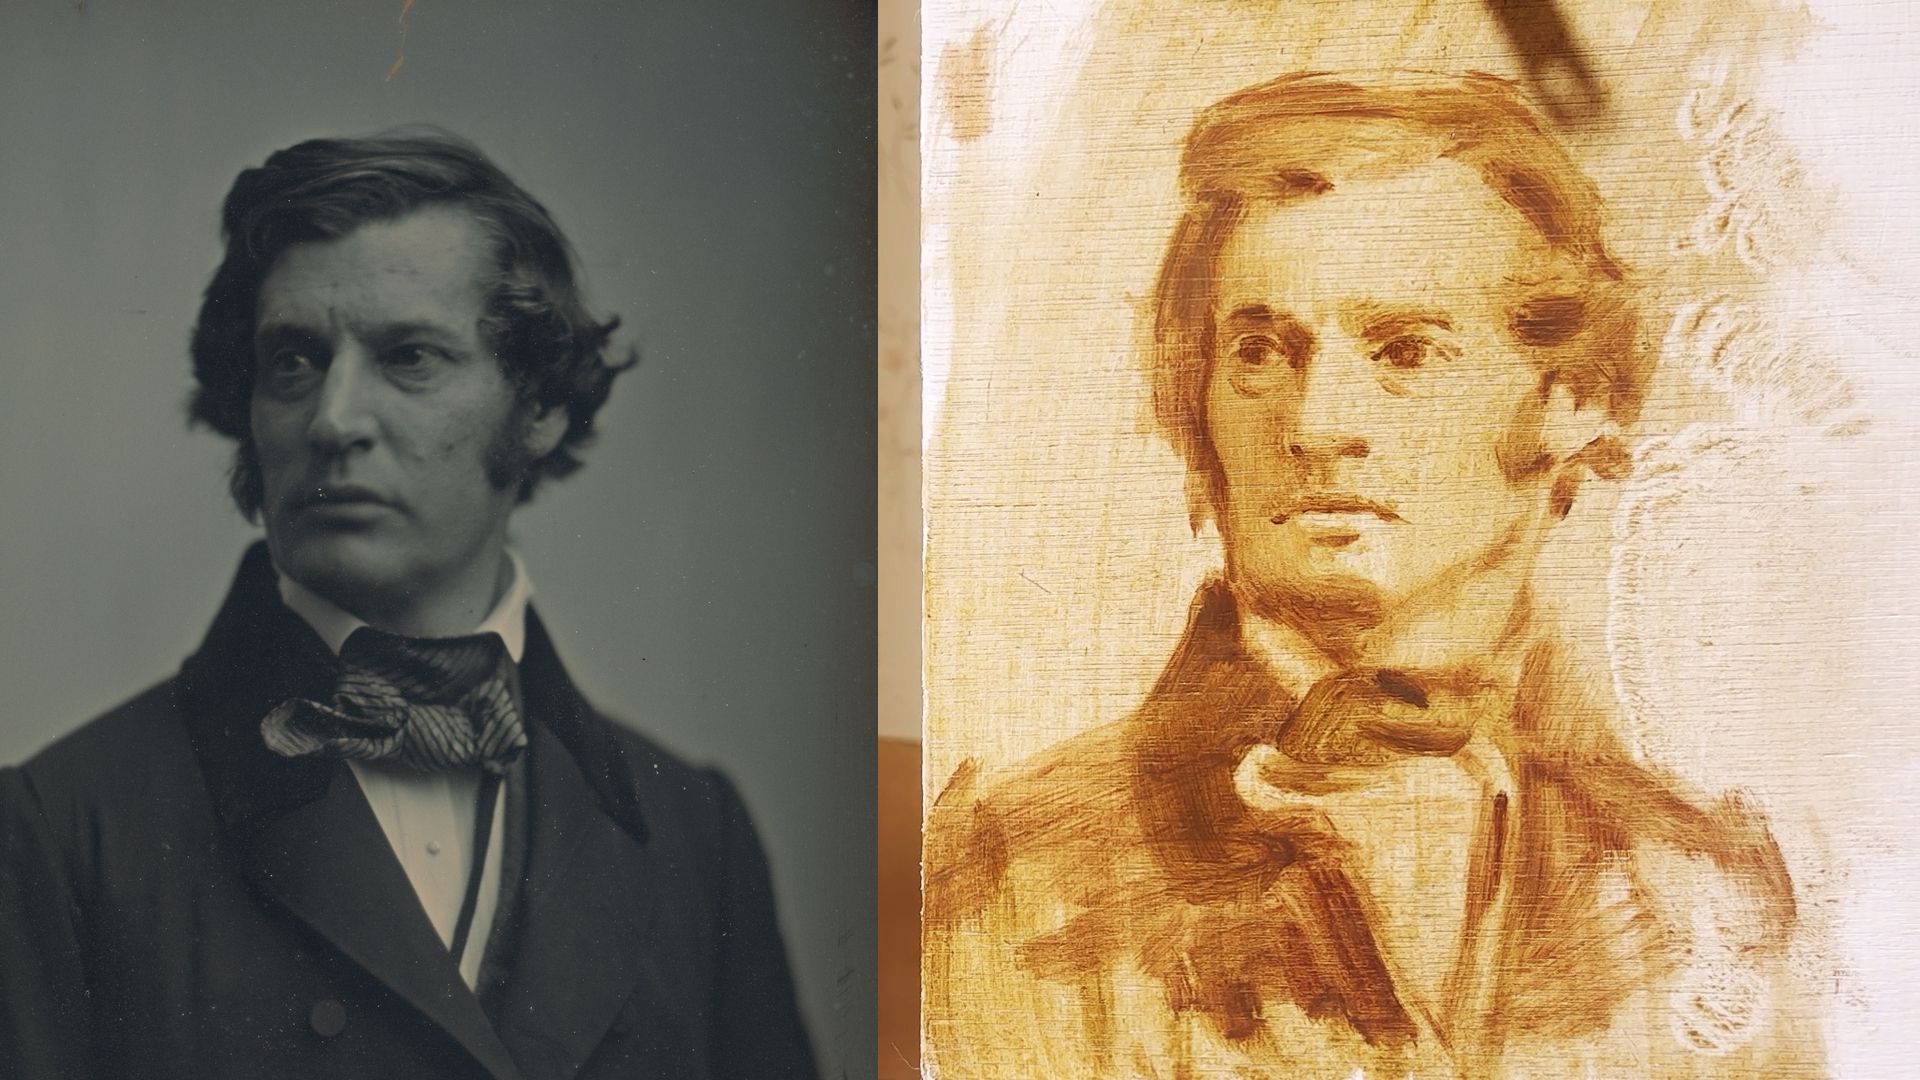
3. Gradually build up the shadows and refine the shapes and forms of your subject. Take your time and work in soft passes - this will allow you to stay in control of the amount of paint on the surface.
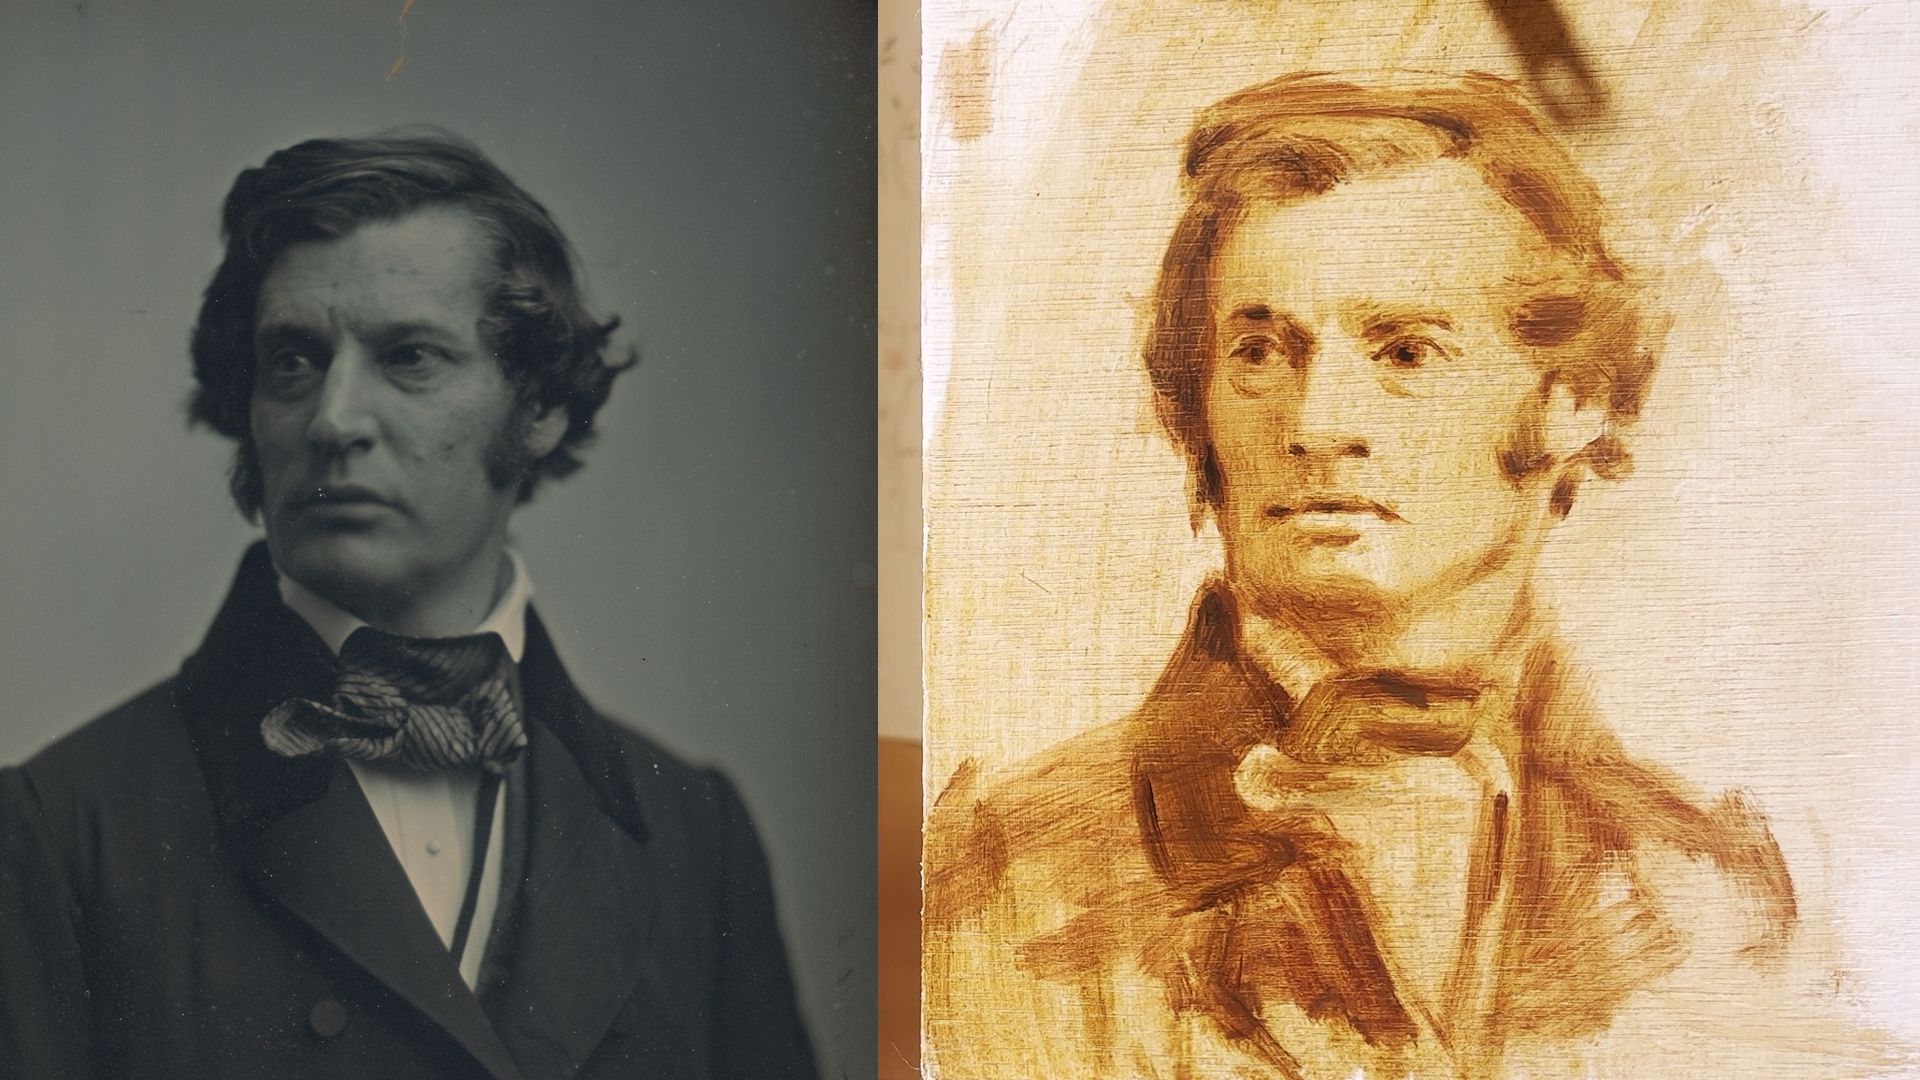
4. Gradually build up the shadows and refine the shapes and forms of your subject. Take your time and work in soft passes - this will allow you to stay in control of the amount of paint on the surface.
For more detailed guidance, you can watch these complete lessons on our YouTube!
Getting Started:
Developing the Dark Tones:
OCAD is part of the Cambridge Online Education Group - Company number 06594953
Registered UK Learning Provider 10033485
Cambridge Online Education Ltd

